
Creating content
The Templates page is where you build and edit your own content. It has three kinds:
- scenario (a full playable world)
- character (a reusable card)
- card pack (a bundle of characters and story cards you attach to a scenario as one unit).
Many fields in the editor have a rework button. It rewrites that item from change instructions, covered in Rework with instructions.
Three ways to start
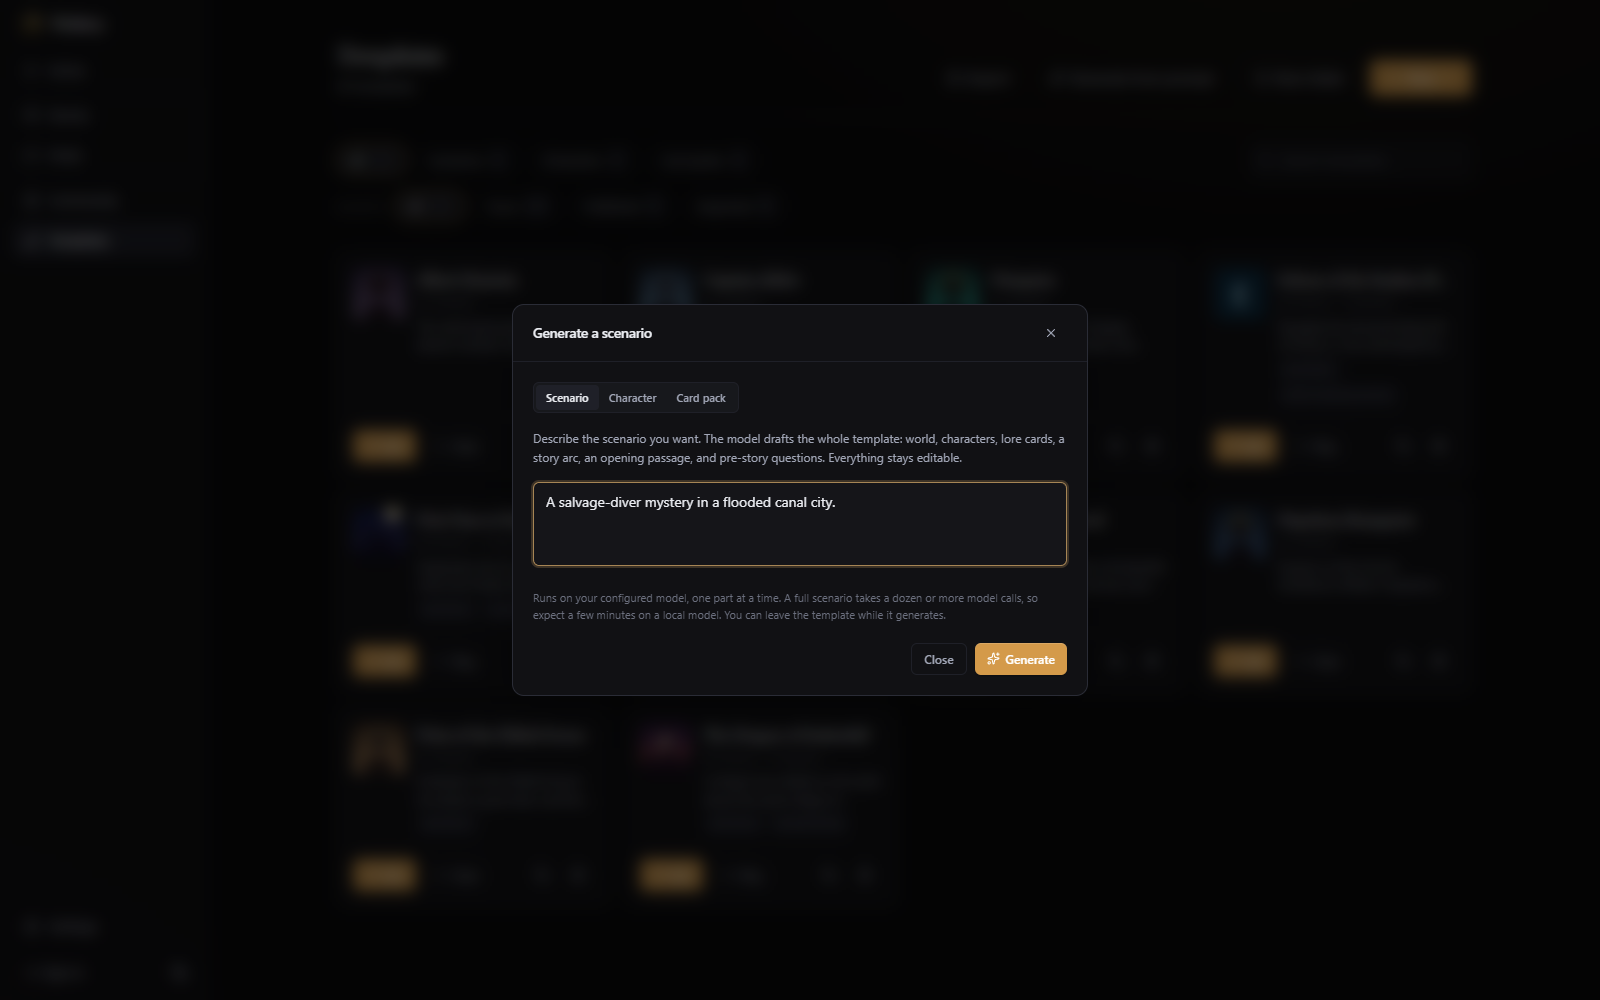
- The Generate from prompt flow builds a scenario one part at a time, which means it takes some time. While it runs, the editor fills in as each part finishes, and you can pause, resume, edit the partial draft, or leave and let it finish in the background.
- The "New" button opens a blank scenario, character, or card pack. You fill in the fields and save it to the catalog.
- The Import button loads a
.jsonor.qbp(compressed JSON) file. The imported template is added to your template list.
The eight editor sections
1. Starting state
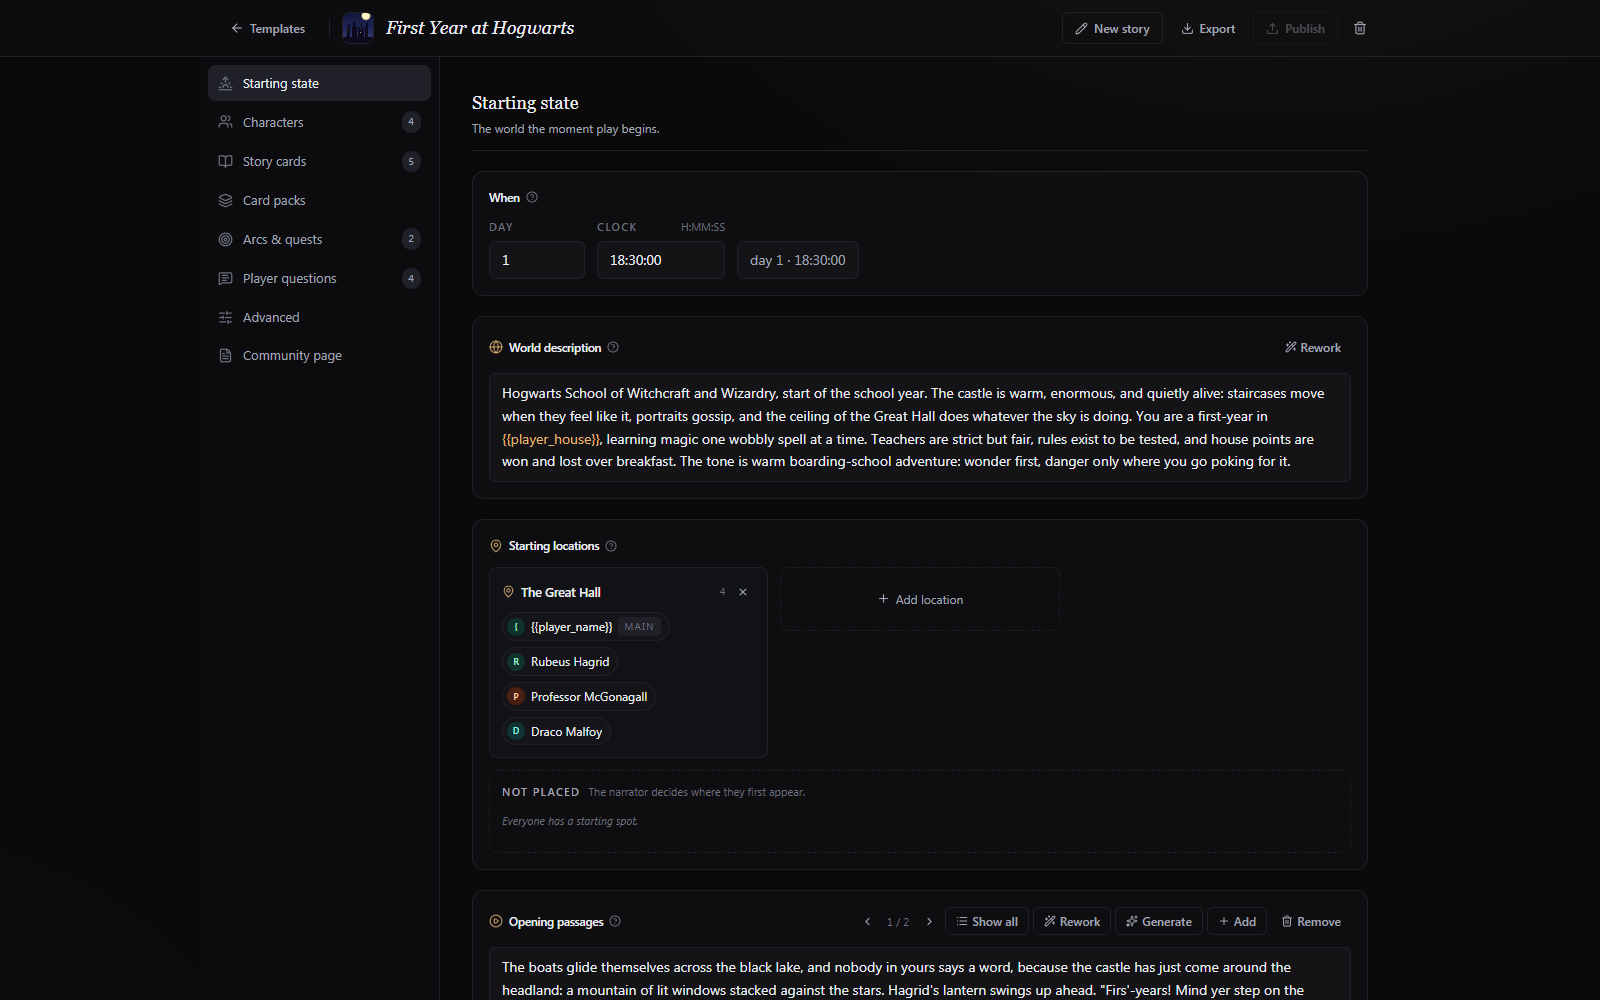
This section sets where and when the story opens. The world description is the setting and tone that apply to the whole story. It is sent to the AI with every reply, so it's worth spending time on. The starting day and clock set the in-story time, which the clock agent advances as you play.
In the next section you set the locations of the characters in the opening scene. If you leave a character unplaced, the narrator decides where they are. The narrator can also move characters around in play, so you don't have to place them all at the start.
In the last section you set the opening passages. An opening passage is the first message of the story. It is the first thing the player sees after answering the setup questions, and the player's first turn is a reply to it. If you add several, each new story picks one at random.
2. Characters
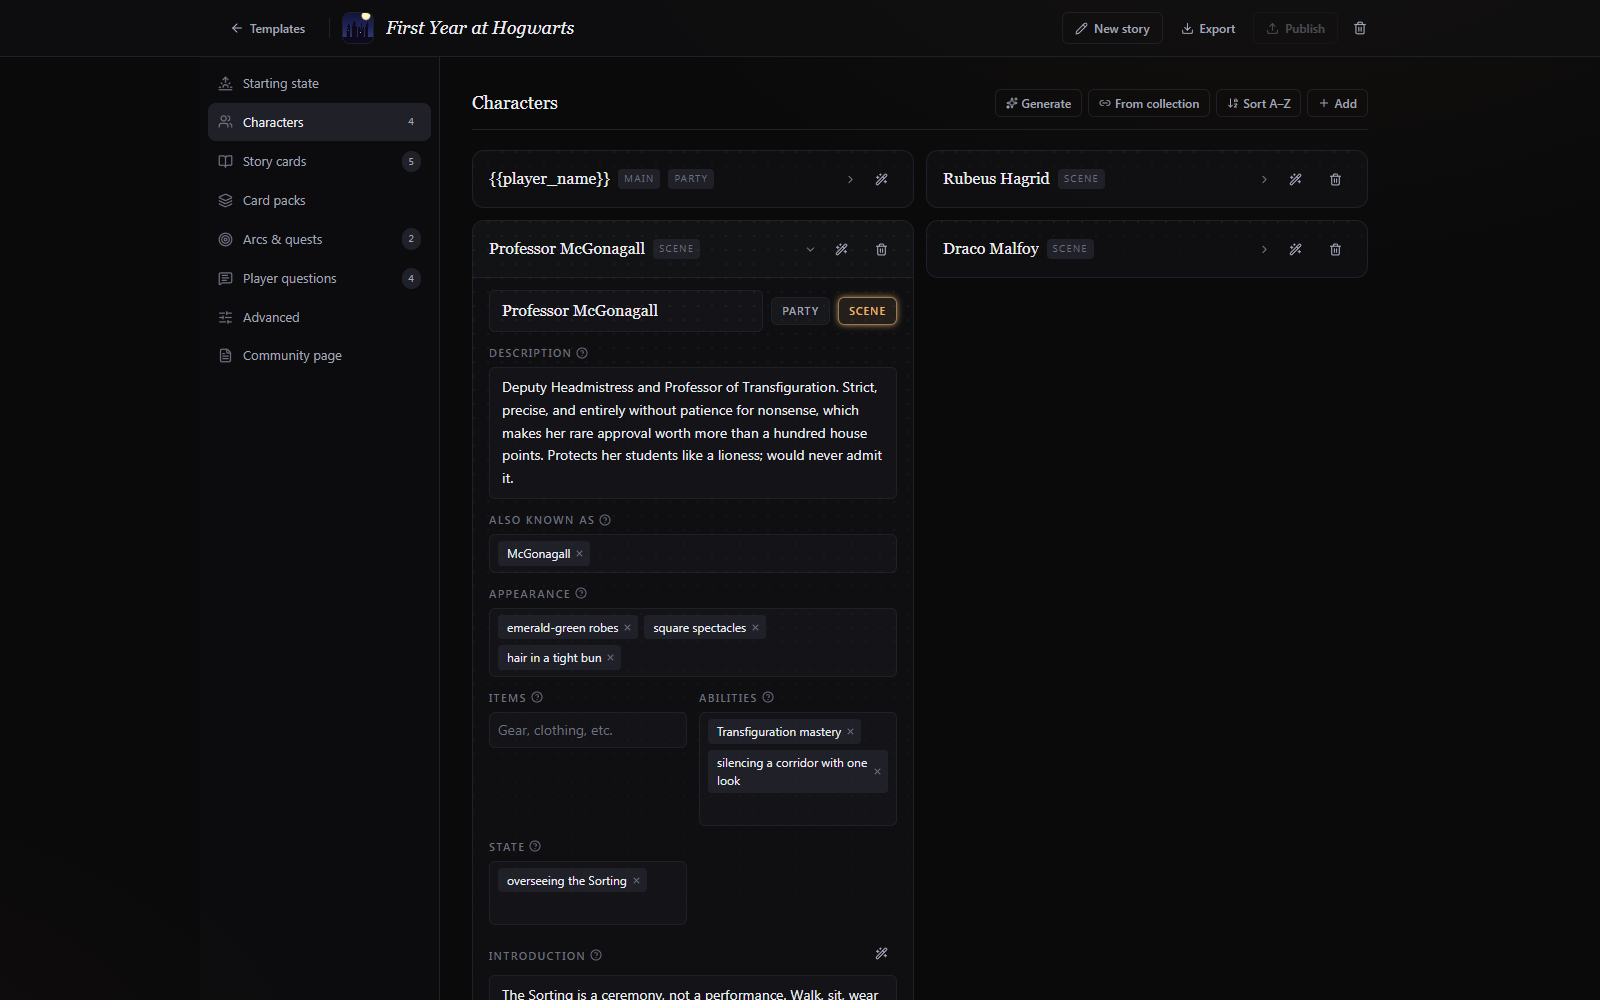
Each row expands into the shared body form: description, other names, appearance, items, abilities, and state. The Party and Scene toggles decide who travels with the player and who is present when the story opens.
A character can be written inline here, or linked from a separate character template so one character can appear in several scenarios. A linked character is a snapshot taken when you added it, not a live copy. If you edit the source template afterwards, the card gets a Stale badge and a Pull button to take a fresh snapshot. If you delete the source, the card says Source missing but keeps working, because the story uses the snapshot.
3. Story cards
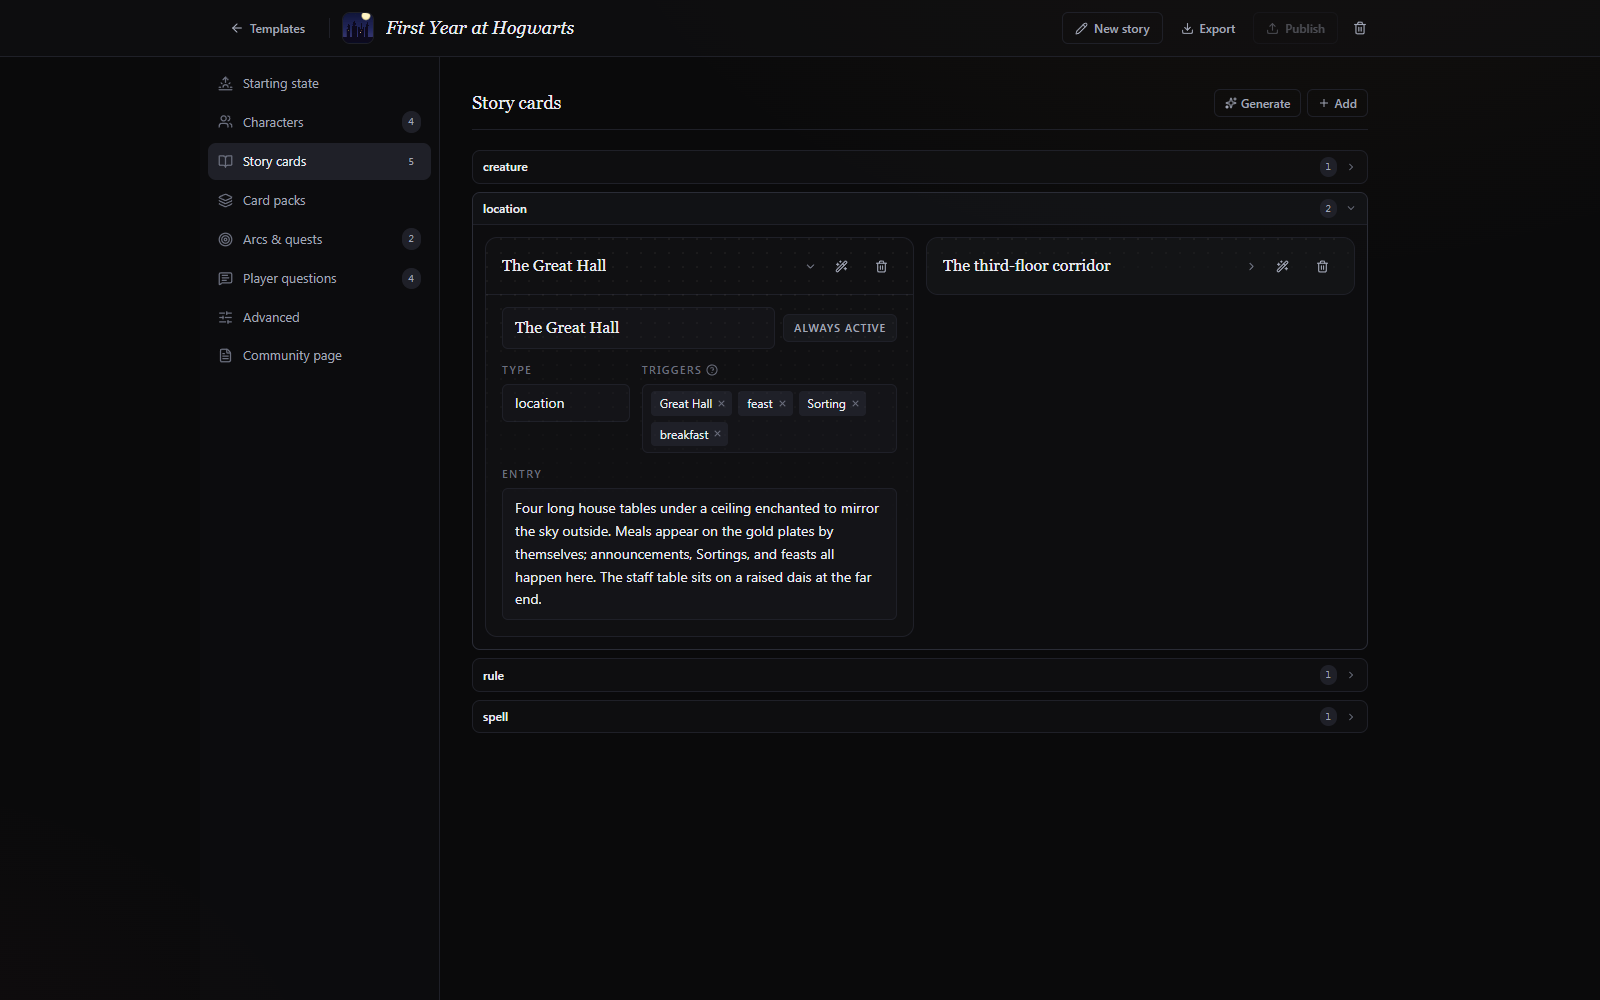
Story cards are included in the narrator context when one of their trigger words appears in the recent messages. Story card type field groups it into categories that can for example be a location, a faction, an item, a rule, etc. Each card has an entry and a list of trigger words. A card can also be marked always active, which makes it included in the context always. The cards are editable mid-story, covered in The world state.
4. Card packs
A card pack is a bundle of characters and story cards. Attaching a pack brings its whole contents into the scenario, so you don't have to rebuild a shared setting for every scenario set in it.
5. Arcs and quests
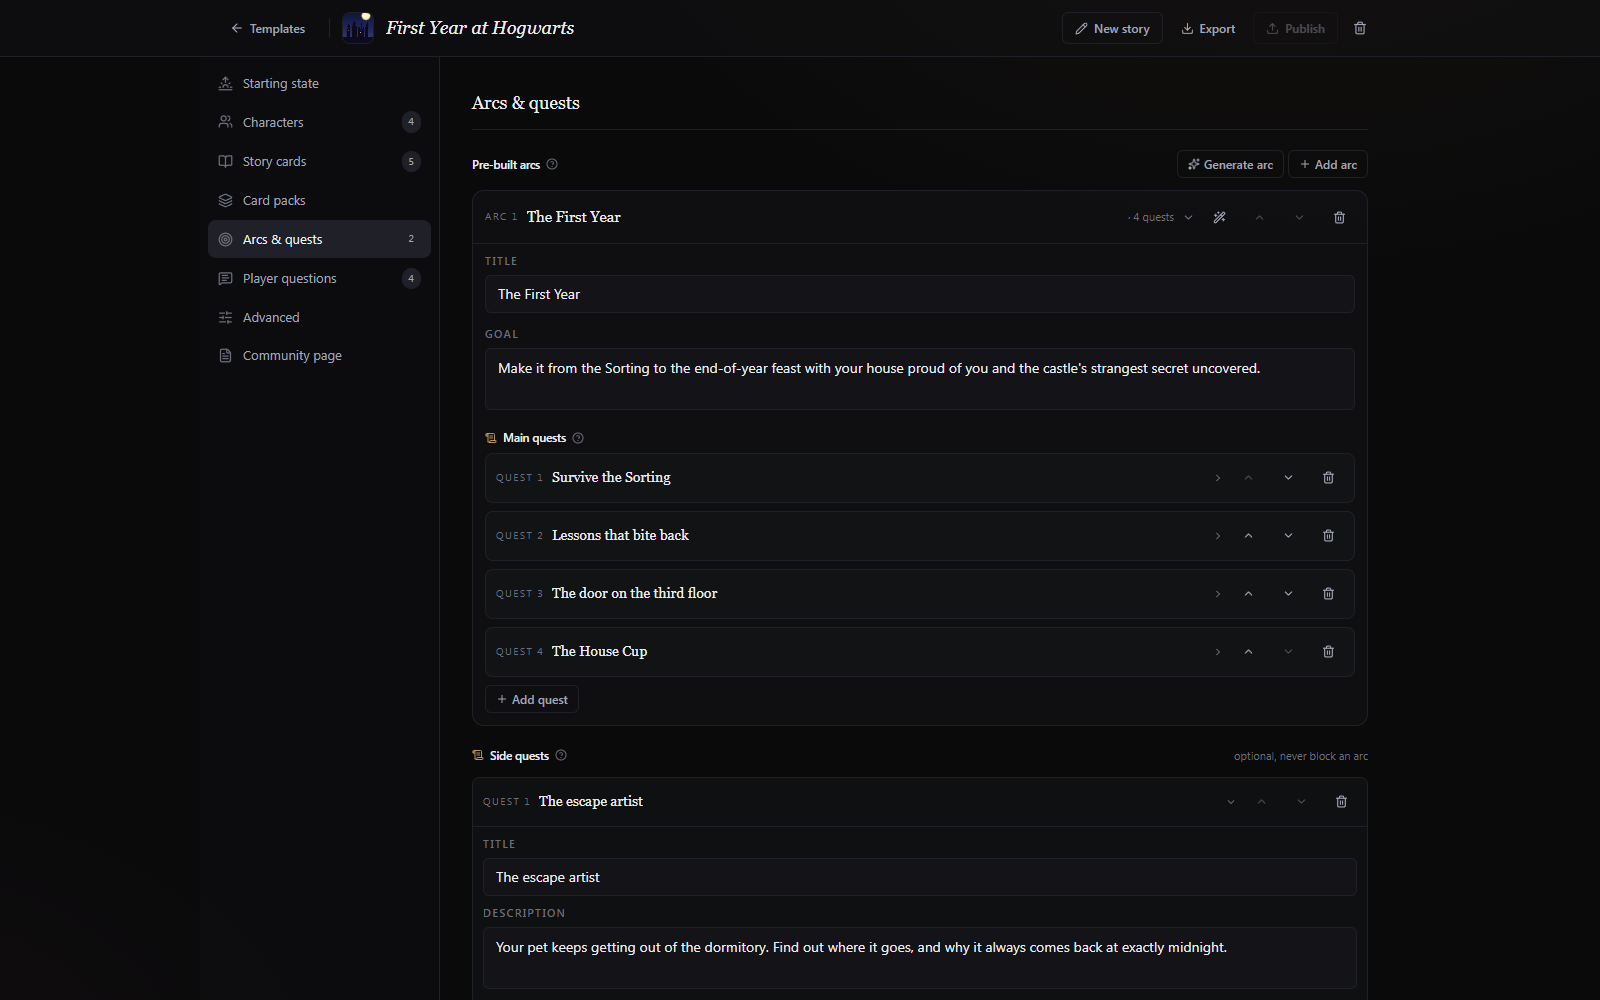
An arc is a chapter: a title, a goal, and an ordered list of main quests. The first arc starts the story. The other arcs appear as options when an arc is finished in play. Side quests are optional and should not affect the main storyline.
6. Player questions
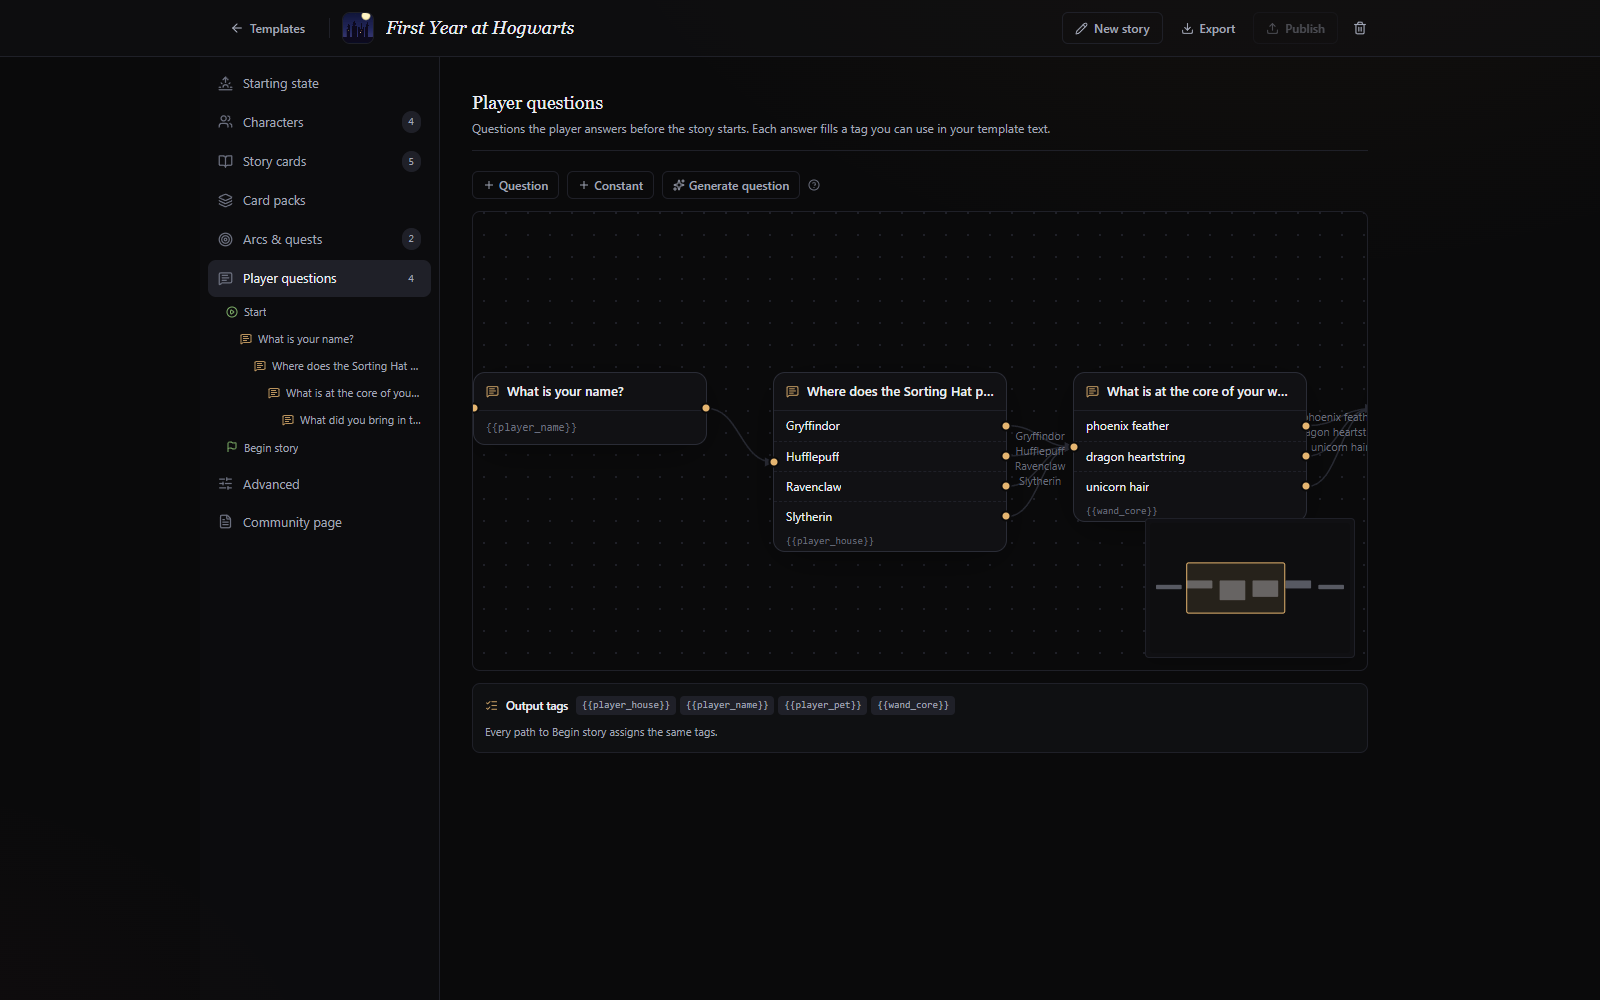
This section has the setup questions a player answers before the first scene, built as a small node graph. The graph goes from "Start" through each question to "Begin story". Every answer sets a tag, like {{player_name}}, that you can use anywhere in the scenario text. The panel below the graph lists the output tags and flags any tag that is not used anywhere, which usually means a typo.
A question can branch based on the answer. However every branch of the graph must fill the same tags, so the next question can be worded differently depending on what the player chose, but it cannot be a different question entirely.
This does not work because the follow-up questions fill different tags. A player who chose Mage never fills {{weapon}}, so any scenario text that uses {{weapon}} would have a blank in it.
{{attack}}Both follow-up questions fill the same {{attack}} tag, so it is set no matter which class the player picked. Only the wording of the question changes per branch.
The question branching only works if there is no free-text answer field. A question with a free-text answer is always a single branch, so the next question is the same no matter what the player wrote. This does not mean the answer is ignored. The text is stored in a tag and can be used anywhere in the scenario, including in later questions.
Click the start or end node to show a live preview, which lets you answer the questions as a player would when starting a story.
7. Advanced
This section has settings most scenarios never need: the story's text format, which background tracking agents run, how many messages a summary covers, token budgets, and per-scenario overrides for the task prompts themselves. An override applies only to stories made from this scenario, so it's a safe place to experiment with a prompt you liked in the benchmark. Note that an override replaces the built-in prompt rather than adding to it.
Setting the text format to Markdown or HTML only changes how text is displayed. The model is not told about it, so it keeps writing plain prose until you ask for the format in the Storyteller prompt yourself.
8. Community page
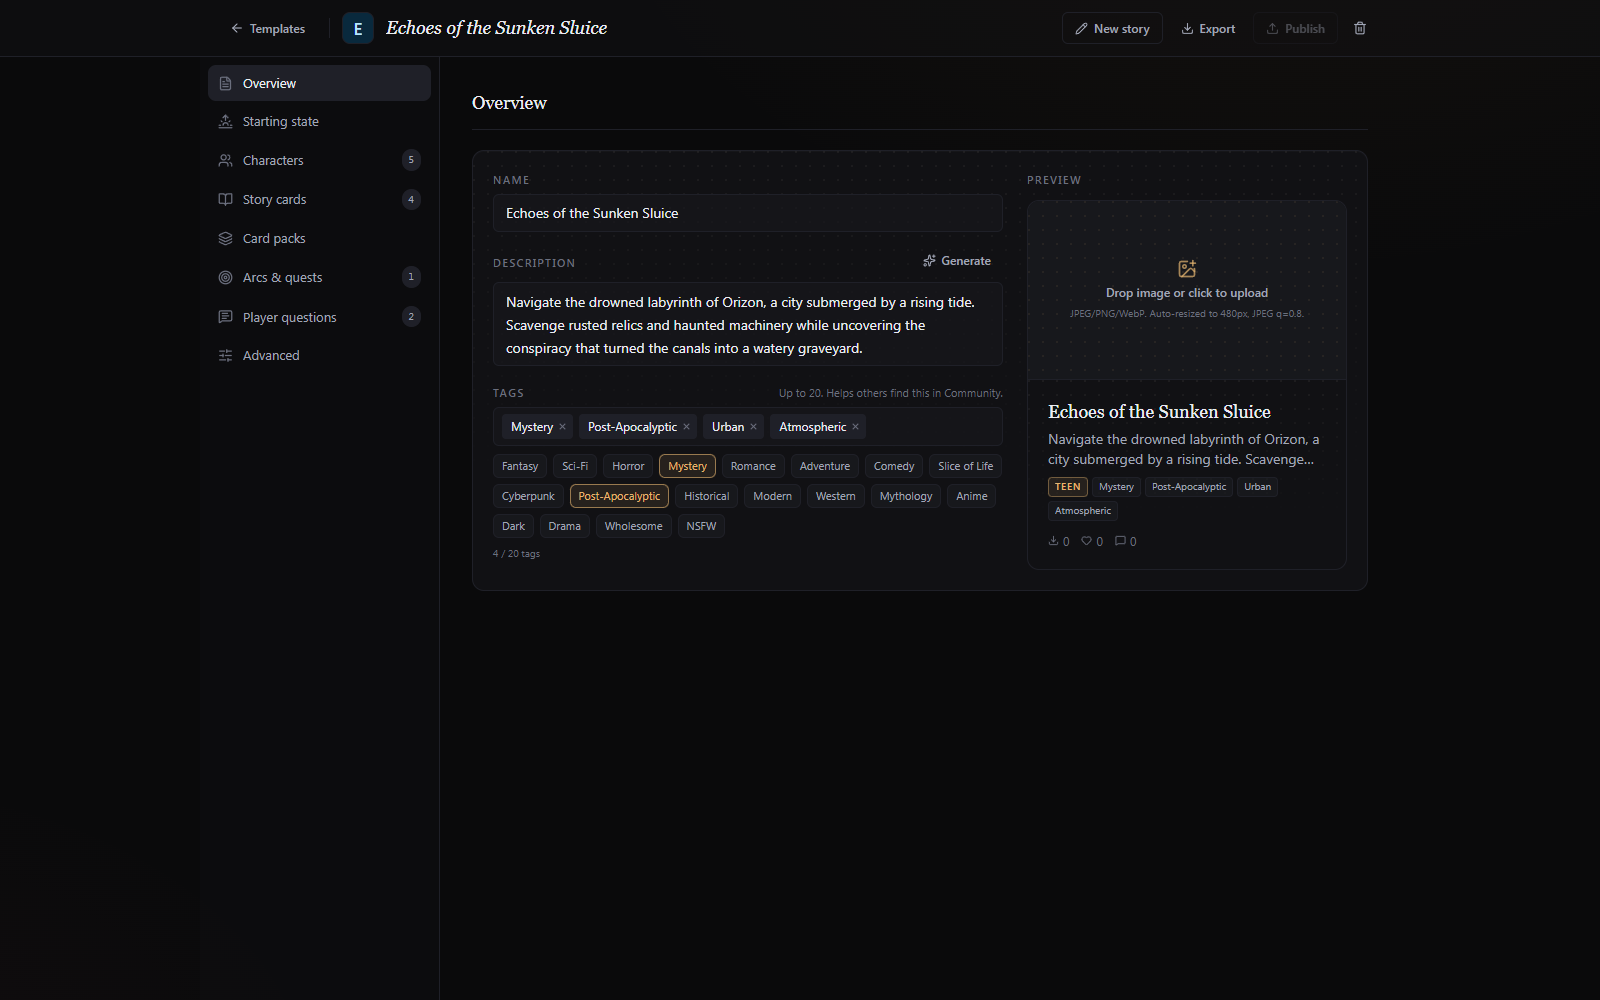
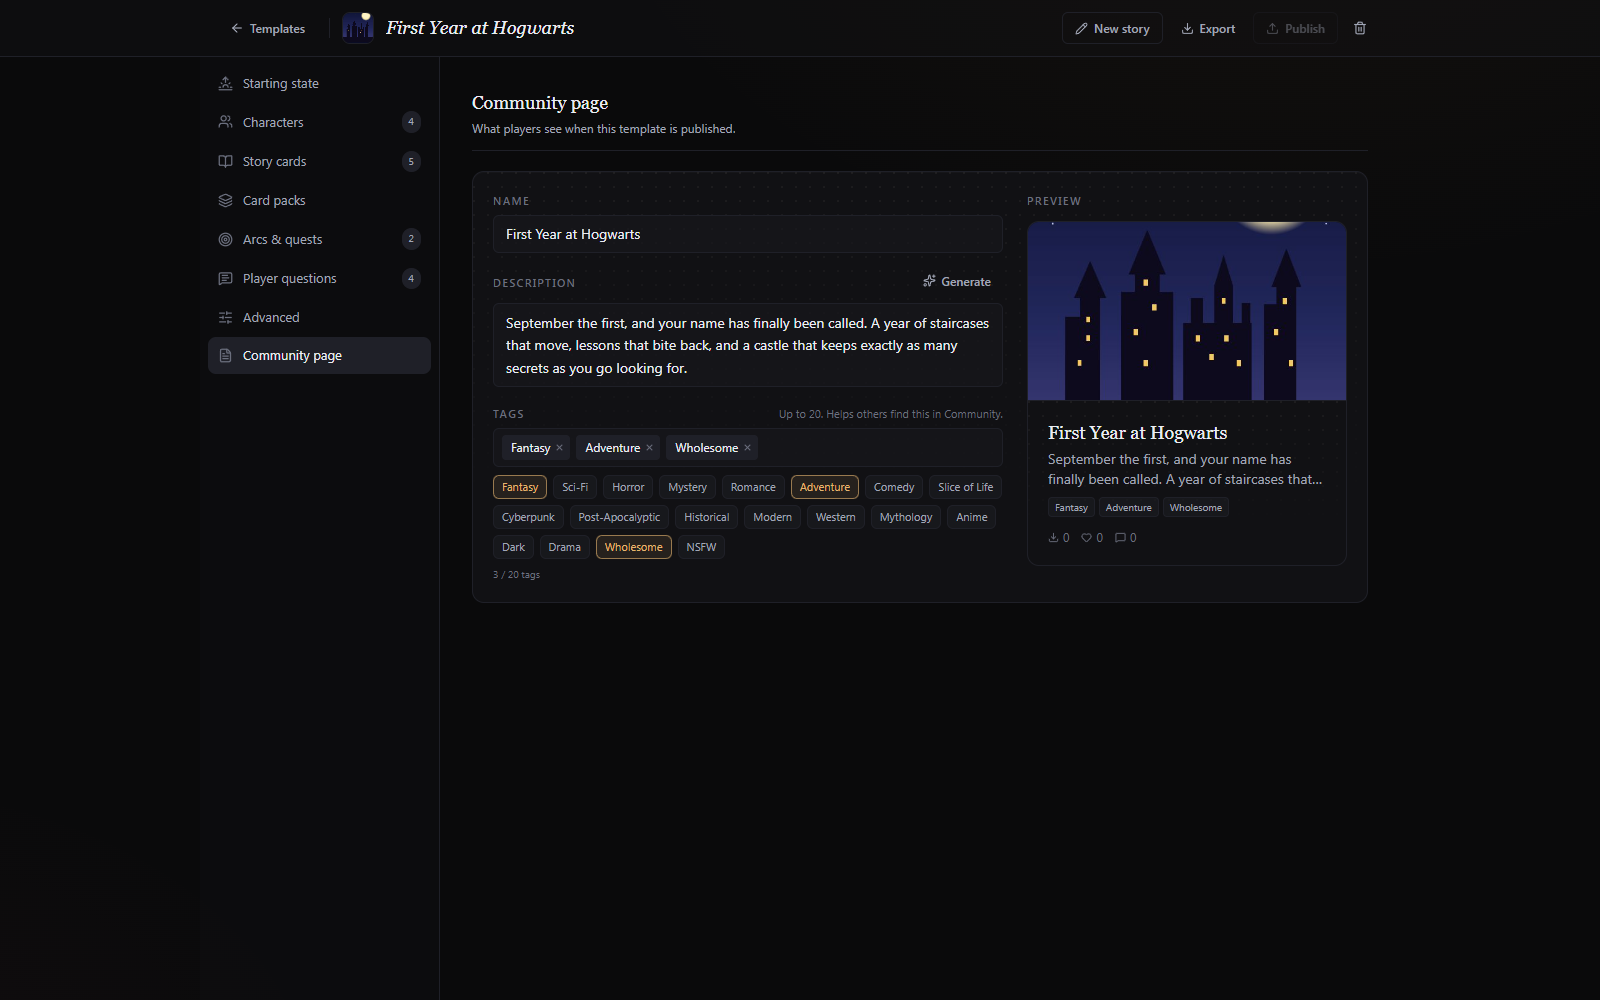
This section has the name, the description, tags, and a cover image: what the Community catalog shows to other players once the scenario is published. The description has a generate helper if you'd rather draft it from what's already in the scenario. The right side shows a preview of the catalog card, so you can check how the cover and the description look before publishing.
AI help while you write
Two AI assists are available throughout the editor. A generate button drafts one new item from the scenario's context: an arc, a side quest, a story card, a character, a question, or an opening. It opens a dialog that works like a chat with the model, so you can refine with follow-up instructions, and nothing is applied until you press Apply. The rework button does the same for an existing item, covered in Rework with instructions.
Character voices
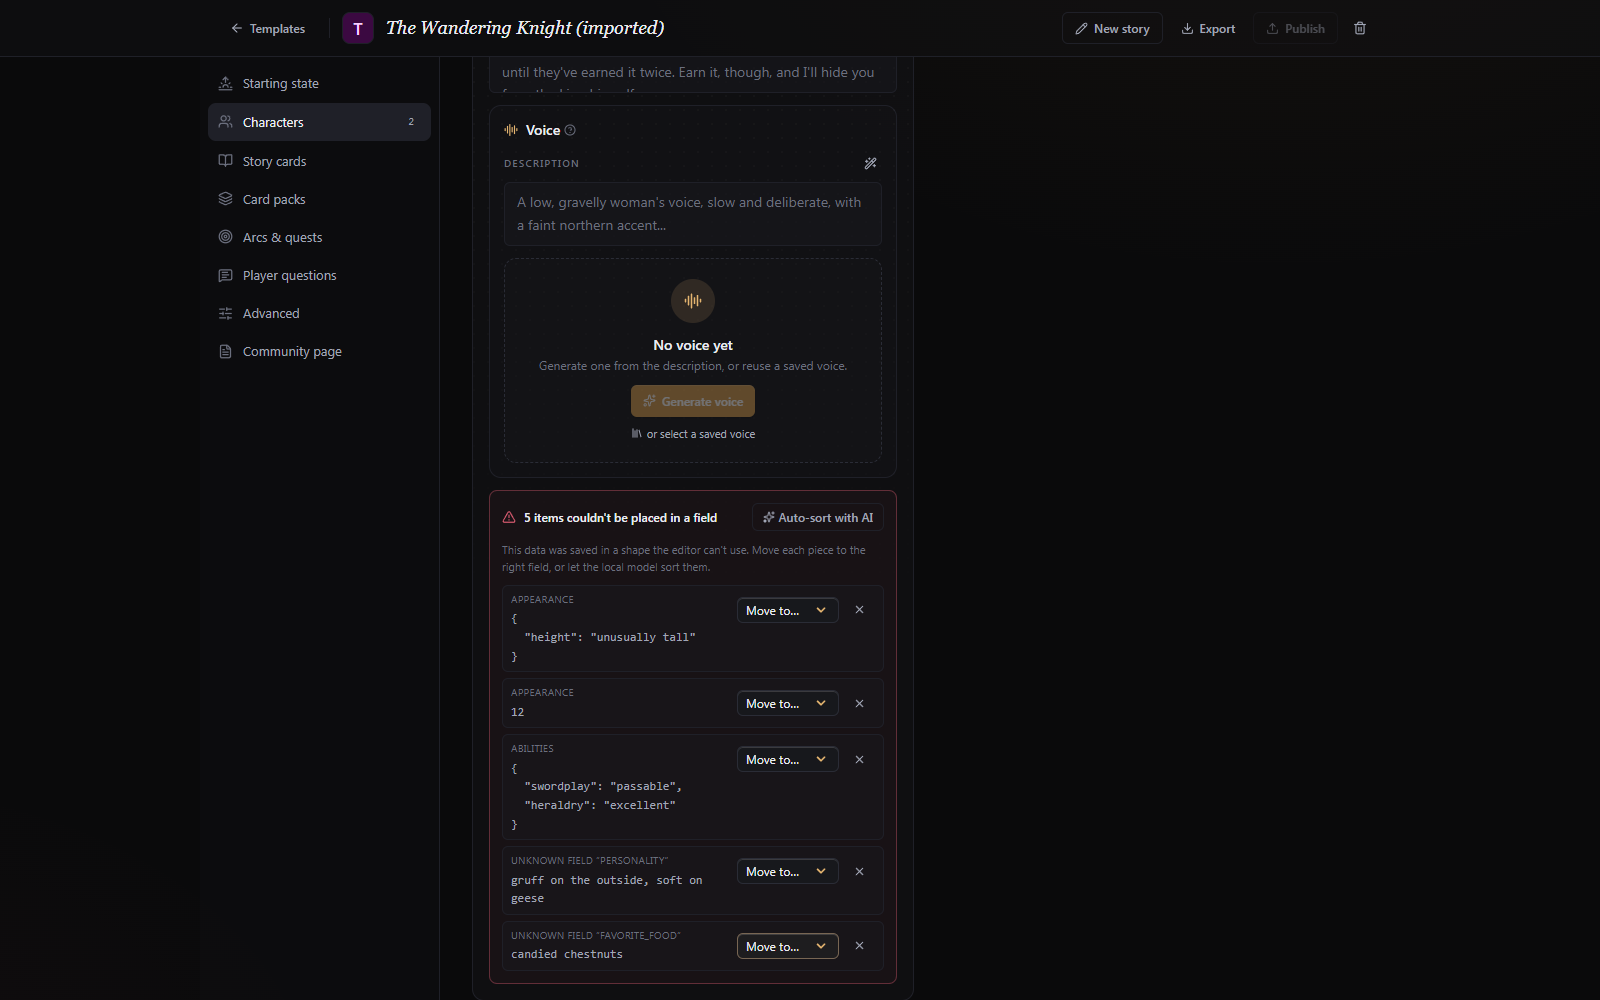
A character (NPC) has two voice fields, each for a different model. The introduction is a first-person line written in the character's own speech pattern. It is a writing sample for the LLM, so the character's dialog keeps its own way of speaking. The voice description says what the character sounds like. It is not for the LLM at all and is never in its context; only the voice model reads it, to generate the character's voice. In the Voice section you can generate based on the description or pick one of your saved voices to reuse. Each character then speaks with their own voice when a beat is read aloud (see Voice and narration).
Fixing imported content
Imported or older templates sometimes store a character's data in the wrong shape. When that happens the editor flags it and offers Auto-sort with AI to move the misplaced data into the right fields, per character or for the whole template at once. It applies as an unsaved draft so you can review before saving.
Saving and exporting
An unsaved changes bar lists every pending edit, grouped by section, and lets you revert any single one or save them all. A Modified tag separately marks imported items you've edited. Export writes the template to a file, either readable .json or the app's compressed .qbp, for backup or sharing outside the catalog.